How To create Flower Girl in Photoshop

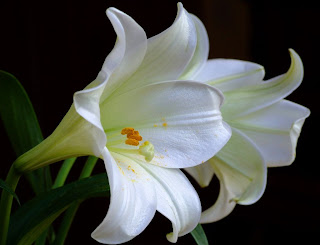
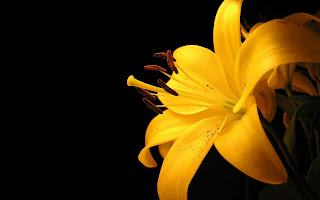
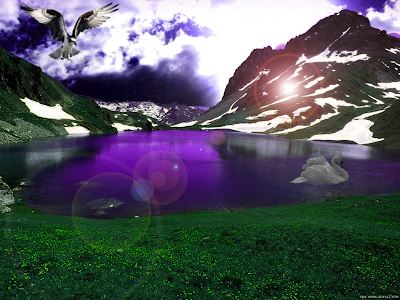
I will use below Images for this tutorial


Open your Image in Photoshop, then i will remove its background


Then Open flowers you wish to use and remove background as well,After removing the background then drag them on top of your Imge

Go to Image - Image rotation to rotate flowers as you desire

Click on CTRL+T to resize and position flowers as you desire


Now merge all Layer

Make sure all layers are selected in Layer pallette then right click and select merge Layers

You will now have only one Layer

Now i will open an image that will be used as a background, then i will drag my image on top of it


Go to Image - Adjustments - Levels ( and adjust channels as you desire)
Go to Image - Adjustments - Brightness/contrast and set light as you desire

Below is my final Image


Fantasy Photo Manipulation

This tutorial will show you how to combine different photos to create Fantasy Landscape Manipulation.

Open Image you wish you manipulate


Now remove the sky so that we can add another amaizing sky into the picture

There are different ways to remove the sky but i will use channels

Go to Window > Channels . On this palette you can see four different layers – RGB, Red, Green and Blue.


Right click on the Blue channel and select the option Duplicate Channel… Make visible only this duplicated Channel
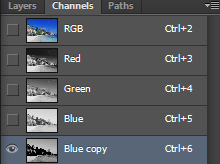


Go to Image > Adjustments > Levels or press Ctrl + L on your keyboard. Set the Input Levels on 128; 1,00; 232 and press OK. You should get something like on the following picture.


White color shows part of the picture which will be selected and black part stays unselected. If you let some grey colors in the picture they will be selected .To make the whole ground black grab the Brush Tool (B), pick black color and simply paint over the grey areas of the water.

Carefully paint over them with white brush. You should get something like on the picture below. On the following picture you can see how the channel should looks like.


Make visible all channels except the one named “Blue Copy”. Go to Select > Load Selection and set the window which appear as on the picture below. Press OK.


Do that by pressing Ctrl + Shift + I on your keyboard or go to Select > Invert. Then click on the button Add layer mask which can be found in the bottom part of Layers palette.


Below is my picture after removing the sky


Open new sky photo, drag it ontop of your Image and it will create a new Layer


To make new sky the background simply drag Sky layer on top of backgroung layer (layer0)
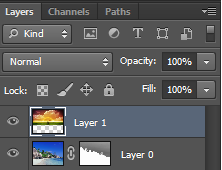


Press CTRL+T to resize and position the sky so that it can fit well, then press enter when you are satsified


Now  play with Light  and adjust colours on both two layers as i desire

With layer 1 selected, am now going to add more light into sky layer
image- adjustment- exposure and play with it until am satsified
will do the same to background layer


Create a new layer on the top of all layers and name it LENS FLARE. Grab the Gradient Tool (G) and fill this new layer with solid black color.
Go to Filter > Render > Lens Flare and set lens type to 50-300mm zoom

Add rainbow to the image - ( Follow previous tutorial http://photoshopeditingtutorials.blogspot.com/2012/10/how-to-add-rainbow-in-photo.html on how to add rainbow into an image)

I will also add a fantansy girl and a bird to the image

Finaly will Go to Image- Adjustment - Levels and play with it until you are satsified

Below is my Image after manipulation
How to Add a Flower on Girl's Hair

This is a very simple and quick tutoria on how to add a flower on girls hair

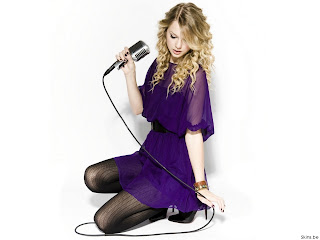
Open you images in photoshop, I will use below images


Remove flower background using Erase tool and Magic erase Tool


Then drag the flower on top of girls image, then click CTRL+T to resize and position the flower using handles


 Apply burn tool to make the flower  a bit darker 


Then  add noise to make it look real
Filter - Noise - Add Noise, then will set amount to 2, and makesure Gaussian and Monochromatic is selected


Go to Image - Adjustments - Exposure and Brightness and contrast to fix color as you desire

Below is my final result


How to change part of photo to black and white

Open your Photo in Photoshop, i will use below


Double click the background layer in the Layers panel and rename the layer so that it can be editable

Create an Adjustment layer that will allow us to make changes to the photo without harming the original.
Click on created new Fill/  create new adjustment Layer and choose Hue/Saturation


When Hue/Saturation box opens, check colorize  box and then slide the Saturation slider all the way to the left. This will make your photo black and white


Create a new layer above the Adjustment layer


Choose the History Brush or simply Click Y, make sure that black is your foreground color. Then start painting the areas you want to have color show up . If you paint too much, use the eraser tool to correct

Below is final result

After


Before

Related Posts Plugin for WordPress, Blogger...