How to Colorize a Photo with Multiple Colours

In this tutorial we will learn how to colorize a imagine with multiple colors

First open your Photo in Photoshop and then remove all the color ( it should be black and white), then unlock the background layer or you can simply create a duplicate of background layer so that changes does not affect our original photo

Then we need to section our image in three parts using Guide. Simply go to VIEW - NEW GUIDE, Then set position to 30 or when Move tool is selected after creating a new guide you can set the position you desire by dragging the lines. Repete same procedure to create as many guides as you like


Note: Make Sure Snap To Guides Is Turned On


Once done, Grab the Rectangular Marquee Tool to start dragging a selection around our first section


Now create a new adjustment Layer Hue/Saturation for the first selection,  Check colorize and preview box
Change Blend mode of this Layer to color


Repeat same procedures to colorize second and third Sections

Go to View > Clear Guides to remove the guides from your photo


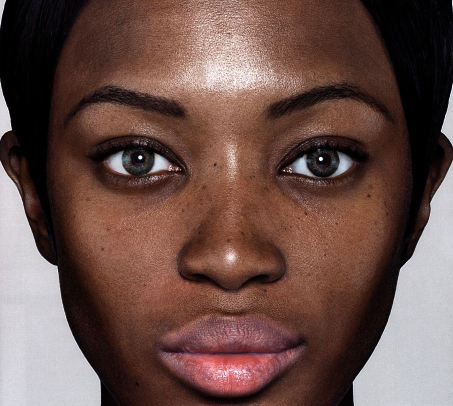
Well that's my final photo


How to create Film Strip Photo Collage with Photoshop CS6

In this tutorial we will lesrn how to create photo collage In Photoshop
Howerver, am not going to create film strip instead i will upload them from the internet
My collage will contain Three pictures and one background image

As usual, i will start by opening background Image
 Then open film strip downloaded from the internet then using Move tool drag them to your background image
To have more strips just duplicate strip layer to your desired number
Arrange the strip as you will like them to appear


Start opening other photos into Photoshop and place them careful on top of film strip
You can decide to edit your photos as you desire...


Well that is!

How to Install Brushes in Photoshop CS6

Download Brushes,Check my previous tutorial for the list of free brushes for Photoshop CS6

Save your brushes to (C:\Program Files\Adobe\Adobe Photoshop CS6\Presets\Brushes) folder in your computer. If the simply is not in that path then simply locate Brush folder in your machine

After Saving Brushes then simply open your image in Photoshop

The brushes should now appear in your list and be able to be selected and used. They should also appear the next time you fire up Photoshop.


That's it

Download Free Explosion Brushes For Photoshop CS6


There are plenty of brushes that you can download and install them in Photoshop in very easy step

Following below link to download brushes

Explosion Brushes These brushes allows you to add fire and to manipulate your images


How to create Colorful Pattern/silhouette Photo

Open your photo and duplicate the background Layer 


With duplicate layer selected go to Image » Adjustments » Threshold.


With the threshold layer highlighted, run menu option Filter » Stylize » Diffuse... Select Anisotropic mode and press OK.

Now create new adjustment layer - HUE/SATURATION and play with it till you are satisfied

well,  that's it


How to Retouch a photo and apply make up

Open your image in Photoshop


Using Healing Brush click on the spots to remove them


Reduce Noise

Go to Filter - Noise - Reduce Noise
After reducing Noise then simply grab your brush tool and start painting on area where you don't want effect to apply. Paint over the eyes and the mouth


Now grab you Pen tool and draw over the place you want to apply make up, that is the lips, eye etc
After drawing a path using pen tool, right click and make a selection then create a new adjustment layer then color it as desired. create separate layer for each part you want to make up


Well that's it


How to change skin color from White to black

Open your image in Photoshop and then duplicate the background Layer

After duplication, then Change blending mode to Multiply


After Multiplying


Go to Image - adjustment - Desaturate. So as to Desaturate the Layer

After Desaturating


Now we need to reduce amount of shadow effect in the picture
Simply go to Image - Adjustment - shadow/Highlights play with it till you get desired effect


Take your brush tool and start painting on area that you want to lighten especially the eyes and lips

Well that's it

Before


After 


How to Create a Polaroid Effect of your Photo

How to create a Green and Dry Environment

 In this tutorial we will learn how to transform a dry grass land area to greenish one and vice versa

Open you Image in Photoshop


Create a new Layer and name it greenish

Then go to to Image - Adjustment - Hue/Saturation
To achieve greenish result move hue towards blue
Play with it til you get desired effect


Follow same procedure to get dry effect
Thought this time move hue toward


That's it

How to enlarge Boobs/Breast in Photoshop

We are going to use liquify in this tutorial

Open the image you wish to edit in Photoshop


Go to filter - Liquify and select Bloat Tool

Set your brush size to be at least bigger that the size of the breast


Then slowly start painting on the boobs till you achieve best result


How to colorize black and white photos

In this Tutorial we will learn how to colorize black and white photos


In this tutorial i will mostly use PEN TOOL
Open your image in Photoshop, i will use above image
Am going to colorize my Image in parts starting with the hat then the cloth and shoes then lastly the body

HAT
In tool palette select PEN tool and start selecting over the hat, as per below
After selecting the Hat then right click and select Make selection


Set Feather Radius to 2.5 or at least 0


Go to  Image - Saturation - Hue/Saturation
In Hue/Saturation make sure Colorize is checked
Play with it until you get the color you like


 Using same Procedures now select the cloth colorize and shoes colorize
Don't forget to create new layer for each part you select so that you make apply changes perfectly 

 Lastly lets see how to colorize the body

Colorize forebackground as per below


Make selection on body parts that are not covered with cloth,
Make sure eyes and lips are not colored 
Make selection then create new layer

Select Paint Bucked Tool and paint over body parts
Then change Blending to Color and play with Opacity till you get desired outcome


 Use previous method to select and colorize the lips and ring


Well, that's it
Related Posts Plugin for WordPress, Blogger...