How to turn your Photo Image into pencil drawing with Adobe
Photoshop CS6
To achieve fine results I advise that you use high
resolution image, I will be using a picture of Katy perry which I downloaded
from Google images.
Here is before and After


Open your Photo into Photoshop and duplicate the back ground
layer
Go to Layer – Duplicate Layer and name the layer as you
desire, The layer you created will appear on top of Background Layer, this will
give us an opportunity to play around with background copy layer without
distracting the original background copy.
With Background Copy layer selected, we are going to
smoothen your image, Go to Filters > Blur > Smart Blur. You can use below
values or come up with your own,
depending on how you want your image to shape up.

This is what I have now

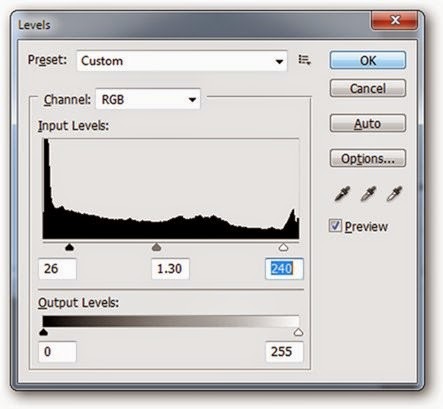
To adjust Levels, simply go to Image – Adjustments – Levels
or simply click (Ctrl + L) and use the following settings
With the background copy layer selected, Go to Layers and
duplicate it, and you will be having background copy two layer...
Now, we are in the last stage o four tutorial
Go to Filter – Filter Gallery – Brush Strokes – Accented
Edges, Adjust Edge Width, Edge brightness and smoothness to your desired effect
Well, that’s it and you will be having something like this
