Discover the fun and entertaining side of Photoshop by Downloading free tutorials
How to create a colorful artistic Image with Blending Options
Open your Image in Photoshop
Duplicate Background Layer
Desaturated the Image
Image - Adjustment - Desaturated
Open New blank Layer
Layer - New - Layer and name it as you desire
With New Layer selected Grab Brush tool and set
Choose Soft Brush and paint on the air, color as you desire
With New layer selected
Go to Filter - Blur -Sulface Blur and Set Threshold to 255, Radius to 100
Right click on the new Layer and select Blending Options
Check on texture, While Holding the ALT key,drag the white slider input to the left ( it should be 170/255), then click OK ( Settings varies depending on your image)
Open Open light brush and drag it into your image, set it as you desire
Download it here
Press Ctrl+T for handles to re-size the photo
Well, That's it
Add digital lighting effects to a photo
 Open up your image in Photoshop
Duplicate background layer and name it as you desire
Open up effects you are going to use and using Move tool drag them into your image .This will create layers for each new effect to drop into your image
Arrange them accordingly
If you want to use my effect please download them here Brushes
To achieve final effect simply go to Image - Adjustment - Levels and play with sliders until you get desired effect

How to create colorful and amazing effect
Open your image in Photoshop
Duplicate background layer and name it as you desire
Go to Image- Adjustments - Shadow\Highlights ( to remove shadow in the image)
Then go to Image - Adjustments - Threshold
Adjust slider until the shadow of the model is black and background is white
Create a new Layer and name it as you like
Select new created later, and right click on it then choose Blending options
Start painting over your Image as you desire
Note: use soft brush
Well, that's it
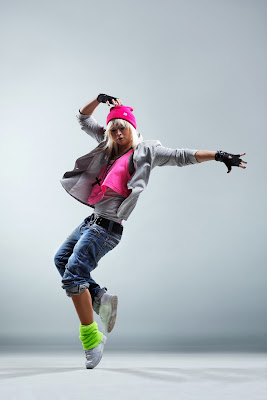
Before
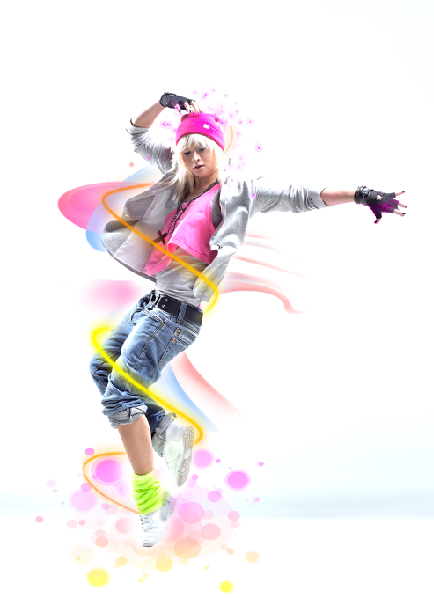
After
Duplicate background layer and name it as you desire
Go to Image- Adjustments - Shadow\Highlights ( to remove shadow in the image)
Then go to Image - Adjustments - Threshold
Adjust slider until the shadow of the model is black and background is white
Create a new Layer and name it as you like
Select new created later, and right click on it then choose Blending options
While
holding down the Alt key, drag the white input slider from the
Underlying Layer settings towards the left. You won’t see any effect yet
but this will help us preview the final results when we add color to
the image in the next step.
Read more at http://www.photoshoptutorials.ws/photoshop-tutorials/photo-manipulation/urban-ink-photo-effect/#dR4cpiTXlboWDT2i.99
Read more at http://www.photoshoptutorials.ws/photoshop-tutorials/photo-manipulation/urban-ink-photo-effect/#dR4cpiTXlboWDT2i.99
Adjust the input slider so that most the background disappears and only the shadows of the model is in bla
Read more at http://www.photoshoptutorials.ws/photoshop-tutorials/photo-manipulation/urban-ink-photo-effect/#mHOC3gslAvXotevu.99
Read more at http://www.photoshoptutorials.ws/photoshop-tutorials/photo-manipulation/urban-ink-photo-effect/#mHOC3gslAvXotevu.99
While
holding down the Alt key, drag the white input slider from the
Underlying Layer settings towards the left. You won’t see any effect yet
but this will help us preview the final results when we add color to
the image in the next step.
Read more at http://www.photoshoptutorials.ws/photoshop-tutorials/photo-manipulation/urban-ink-photo-effect/#dR4cpiTXlboWDT2i.99
Read more at http://www.photoshoptutorials.ws/photoshop-tutorials/photo-manipulation/urban-ink-photo-effect/#dR4cpiTXlboWDT2i.99
Adjust the input slider so that most the background disappears and only the shadows of the model is in bla
Read more at http://www.photoshoptutorials.ws/photoshop-tutorials/photo-manipulation/urban-ink-photo-effect/#mHOC3gslAvXotevu.99
While Holding the ALT key,drag the white slider input to the left ( it should be 128/255), then click OKRead more at http://www.photoshoptutorials.ws/photoshop-tutorials/photo-manipulation/urban-ink-photo-effect/#mHOC3gslAvXotevu.99
Start painting over your Image as you desire
Note: use soft brush
Well, that's it
Before
After
Adjust the input slider so that most the background disappears and only the shadows of the model is in bla
Read more at http://www.photoshoptutorials.ws/photoshop-tutorials/photo-manipulation/urban-ink-photo-effect/#mHOC3gslAvXotevu.99
Read more at http://www.photoshoptutorials.ws/photoshop-tutorials/photo-manipulation/urban-ink-photo-effect/#mHOC3gslAvXotevu.99
How to add lightening effects
In this tutorial we will learn how to add lightening effect to a picture, But in we wont be creating the effects, have just downloaded them from the internet, simply go to Google and search by image.. search lightening png and you will get plenty of effect.
Have come to understand that creating this effect in Photoshop takes a lot of my time so have come up with alternative way
download them here Photoshop Effects you can use this as brushes!
After downloading the effects, open your image in photoshop
Then go to Image - Adjustment - Desaturated ( this will turn the whole photo into black and white)
Then grab history tool brush and paint over areas you want to retain its color, in my image i will paint over the dress
Now open all the effect into Photoshop and using drag tool, drag them over your image, this will create a separate layer for each effect
Arrange them as you desire, but remember the effect should be behind the girl, if they appear infront simply grab eraser tool and erase accordingly
Before
After
Have fun
Subscribe to:
Comments (Atom)


