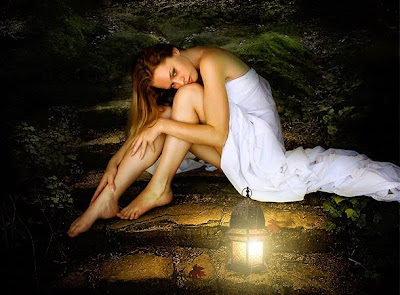
Welcome to another Photo manipulation tutorial. In this
tutorial I will show you how to turn several free stock images into a beautiful
manipulation. You will learn how to manipulate light and several other
techniques
Final image
Resources used
Background 2
First Step
Am going to start with the background images. Am going to
combine two stock image (background 1 and background 2)to create a beautiful background image.
Open the background image in Photoshop. Then use the Pen
Tool (P) and draw a path around the sky. After you’ve made the selection
with the Pen Tool, convert the Path into selection and create a Layer Mask to
hide the selected sky or delete it. I prefer to mask it because it’s a
non-destructive technique.
Or if you are using an image with clear sky you can simply
remove the background by using Magic eraser tool or use any other technique you
prefer
After you remove the original sky from the background image,
open the other stock image using the link at the beginning of the tutorial into
Photoshop and drag it on top of the background layer. Press CTRL+T to get hold
of handles to reposition and resize the image, position it as desired and when
done click on tick icon. (use this for whole other stock images that will be added to you image)
Since I used premade backgrounds for Photoshop am not going
to add any changes at this stage. I will now open train stock image into
Photoshop and drag it into my document, this will automatically create a new
Layer and I will name it train. Am going to add inner light grow.
With Train Layer Selected, right click on it and select
blending options, follow below settings or if you are manipulating your own
images please play with the settings until you achieve desired results.
Also I will add inner shadow on the train, click on inner
shadow and follow below settings
Shadow Settings
Inner Grow Settings
Third Step
We are now going to add adjustment layers to the train so
that its colors could blend with the background image, I will use gradient map
adjustment layer and hue/saturation adjustment layer. Below are the settings
Forth Step
I am now going to add birds into the image, as usual I will
drag this into my current document and name it birds, this layer doesn’t need
lots of adjustments. Therefore am only going to lower later opacity to 71% and
fill 87%.
Fifth Step
I will now add travel bags into the image.
Then I will add
adjustment Layer Hue saturation and apply below settings
Then a Gradient Map adjustment layer with below settings, our
aim is to blend the bags with the background.
Also I will add some shadows – inner and drop shadow to
achieve more realistic look. With bag layer selected right click and then
select blending option and click on drop shadow as well as inner shadow then
add settings as per below
Now we are going to add soft black light around the bag –
Create a new layer and name it bag shadow, grab a soft brush set brush hardness
to 0 size to 3px, lower layer opacity to 86 and fill to 45 then start painting
with black around the bags, make sure fore ground is set to black
Sixth Step
I will now import the lights into the image, i now have only
one light layer, I used above light stock image, duplicated it five times then
positioned in proper places then I merged the layer into one to make editing easier.
Create a new layer, above light layer, grab a soft brush set
brush hardness to 0 size to 3px, lower layer opacity to 86 and fill to 45 then
start painting with black around the bags, make sure fore ground is set to
black
I will paint the lower part of the light with black
Seventh Step
I will now create adjustment layer – Gradient map to affect
the whole image (this is not clipping mask), please follow below settings
Before and After Gradient effect
Eight Step
Am now going to add the model and position here on the railway line in front of the train, we are going to add shadows to our model, right click on the model layer and click on blending option. check on inner shadow and drop shadow box, am not going to utter the settings cause i like them just the way they are.
I want to reduce saturation and light on model, will create adjustment layer (clipping mask) above the model and apply below settings
We are going to add shadows beyond beyond the model, Create a new layer and name it model shadow, grab a soft brush set brush hardness
to 0 size to 3px, lower layer opacity to 86 and fill to 45 then start painting
with black beyond the model to create some shadows, make sure fore ground is set to black.
Do the same below the lights as per below direction
Ninth Step
Create Another Adjustment layer - Gradient map as per below settings ( this should effect the whole image). I used 14234a color
Then set blending mode to Multiply.
The last step is to add some light on the railway in front of the train,Create a new layer and name it train light, grab a soft brush set brush hardness
to 0 size to 3px, lower layer opacity to 86 and fill to 45 then start painting
with black beyond the model to create some white shadows, make sure fore ground is set to white.
Note: sorry i skipped showing how to resize and reposition stock images that were added to the main image, please use same procedures as i instructed in first step
WELL THAT'S IT


